Practice Series – 1st year UG

Reflections of a past student…

BlogsByBeth

If you’re reading this you are probably new, so welcome! You might want to check out a post I made last year: Practice Series – Introduction where I bumble on about some more things I learnt while I was a student at RNCM…

For most students, 1st year is a time for figuring out how life works. You’ve just moved from home for the first time and you are toying with the idea of independence. University students are usually able to use 1st year as an experimental year to find out what is expected from them, without it having any impact on their grade or their lives.

Unfortunately for you, you’re not at university. You are at music college; conservatoire. What you do or do not do now has consequences for your degree and beyond. The time you waste now you will never get back.

Now, I am not at all suggesting that life at RNCM is all work and no play – by all means go out, have fun, make mistakes, spend all your student loan in a week (no, actually maybe don’t do this?), go crazy. But just as this is a great time to experiment and ‘find yourself’ (cringey, I know), it is also the time to explore your own musical interests and abilities, so that by 2nd year you have the tools you need to progress quickly and take advantage of all the opportunities provided by the college.

Why not explore some of our books on motivation and success? Check out the BF section of books (sliding stacks, lower level)

I recommend you spend a considerable amount of time working on the fundamentals of your technique:

Posture
Consider practising in front of a mirror to make sure your body is in prime position for playing and preventing injury. Straight back, level head, relaxed shoulders and arms and no unnecessary movements. By that I mean unconscious swaying or dancing that does not correlate to the phrasing of the music. My personal habit was almost trying to pirouette while playing – don’t do this. I nearly fell over in a performance once.

Pete and Malcolm from our Alexander Technique team have created lots of useful videos on the Alex Tech Moodle page to help you improve posture and prevent injury. You can find more of Pete’s top tips on his YouTube channel, and if you would like a lesson with any of our tutors, information on availability and prices are on Moodle.

Breathing
Wind players, a lot of you will think you are breathing properly, but in reality there’s probably still a way to go. Here’s some things you can do:

  • Blow out all air until you cannot blow any more, then allow your body to breathe naturally. Notice what happens to your body, and try to recreate it.
  • Lie on the floor with books on your stomach. Breathe deeply. The books should move up and down as your torso expands.
  • Breathe in an audible breath, and try to make the pitch as low as possible. It may help to hold your hand in front of your mouth.
  • Imagine the air filling your entire torso, expanding through your back, your side, broadening your shoulders
  • ALWAYS ensure your shoulders are relaxed.

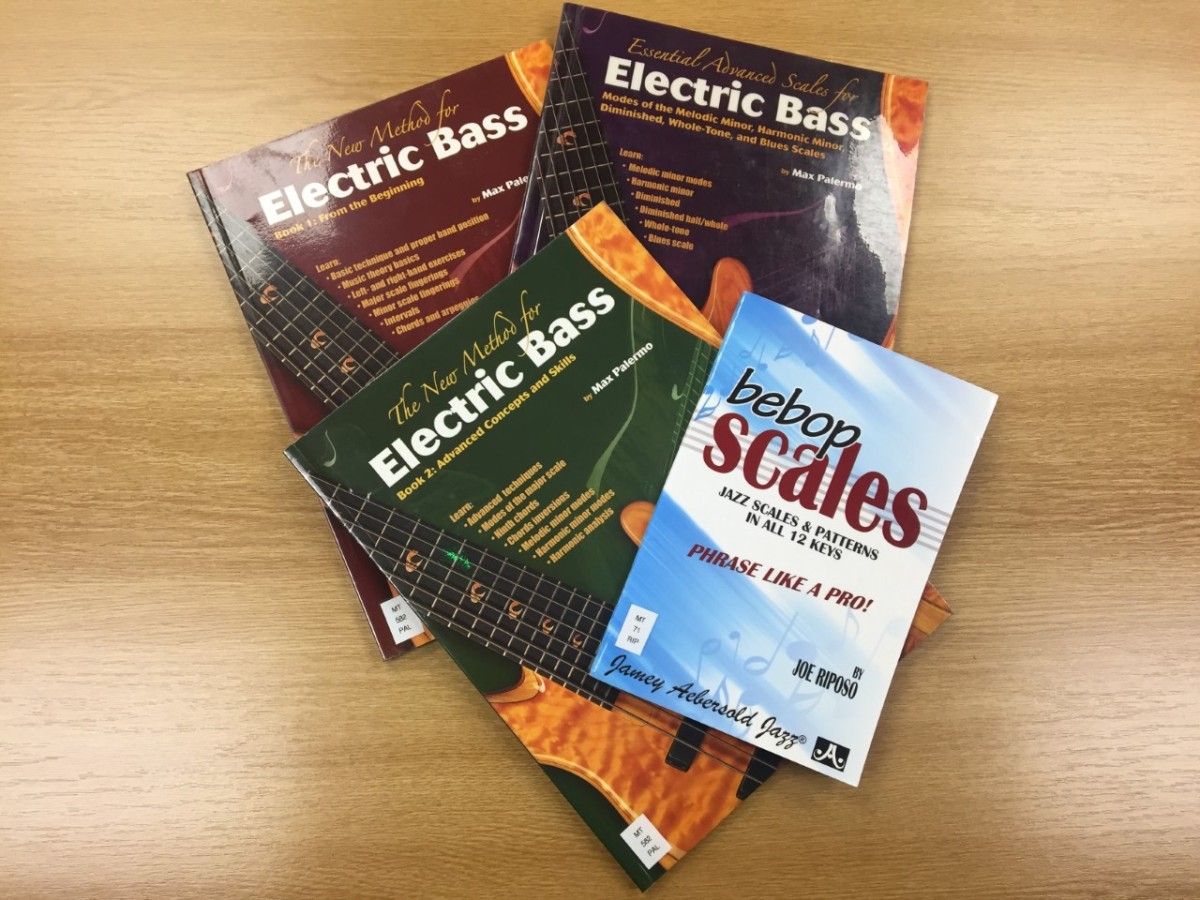
As well as technique books in our MT section (on the left after the CDs and scores) – some containing practice tips specifically for your instrument – we have several books about practice in the library at ML 3825 (down the slope, on the left).

Core strength
Again, wind players in particular – this is so important. Experiment with trying to make your stomach look as small as possible by contracting your abdominal muscles. Usually when doing this you automatically hold your breath, so try doing this and then breathing normally. Test yourself regularly throughout your practice to make sure those muscles are always in use.

Being aware of your core is also beneficial for posture, so it’s good for all of us to practise using it, whatever our instrument.

Tuning
Slow scales and arpeggios people! Using a tuner for reference only. The point is to train your ears not your eyes.

Did you know our DVD collection is quite eclectic, ranging from operas and documentaries to musicals and films.

Articulation
Everyone – practise approaching a note in different articulations and dynamics. Observe what you do and put it into words. Understand why what works works, so that if for some reason your muscle memory ever fails – you know what to do. Wind players: think about tongue position, air speed and direction. String players: think about bow position and speed. Pianists: think about weight and… ask your teacher because I don’t know, I’m afraid!

It’s also a good idea for all instruments to practice fast articulation using scales and ensuring no unnecessary movement by the tongue, chin (winds), arm, wrist (strings and pianists), and fingers (everyone).

You may be able to find helpful titbits in the instrument specific books we have: check out ML 540 to ML 1030.

Relaxed fingers
This was something I had to figure out for myself, and it absolutely revolutionised my playing! Practise scales or easy pieces making sure you keep your fingers relaxed and close to the instrument at all times. Our tendency is to tense up our digits when we are worried about a difficult passage, and this makes them clumsy and unreliable.

Other habits
Finally, if you have any other funky habits that you would do well to lose, ditch ‘em asap. For us bassoonists this may be rebellious thumbs/pinkies or poor flick key management. Ask your teacher for instrument-/ you-specific tips so you can crack down on them straight away.

Work hard, play hard! Beth from the library 😊

Practice series: MEMORY

Reflections of a past student…

BlogsByBeth 

This one is for all the instrumentalists out there (even you pianists – you may be pros at this sort of thing but hey, you could find something that makes your life easier!). A lot of you will soon be working on memorising at least one of your pieces for your recital, which for many will be a daunting prospect. I have mentioned the importance of practising performing from memory in a previous post: like anything else, the more you do it, the easier it gets!

Over the years I have accumulated various techniques for memorisation, adding the ideas of my peers and colleagues to my own catalogue. I think it is best to use as many techniques as possible, as this will only reinforce your learning and create back-up memory files which come in handy if something goes awry on performance day. As a person with a terrible memory (think colander rather than sieve), I can assure you that these tools really do work!

Probably the most obvious tool for memorisation is repetition. You will hopefully be doing this in your regular practice anyway, but breaking up a piece into small sections is vital, as too much information at once is unlikely to create long-term memories. These sections can then be grouped together into larger sections as they become more familiar to you. I would advise starting from the end as well as the beginning, as otherwise it is tempting to start at the beginning every time, resulting in knowledge of the openings bars being a lot more reliable than later bars. Obviously don’t play the piece literally backwards (cue eye-roll), but start with a final section and continue back from there, one section at a time. Starting from different places reduces the reliance you have playing continuously without mistakes: in case section A goes wrong you can get your bearings and start again at section B.  

When creating these small sections, take note of where a theme or motif occurs more than once, and acknowledge any differences between each version. Some of you may like to colour code your music with stickers or highlighters (please do not use anything other than light pencil on library items however!) to provide visual stimuli.   

Did you know you can request items to be bought into the library? Use the online form on the Library Information page on Moodle, or Email acquisitions@rncm.ac.uk – Alison and Julia will see what they can do.

I like to use the piano as a memorisation tool. Attempting to play my bassoon repertoire from memory on the piano ensures that I do not overly rely on muscle memory to play the correct notes. If muscle memory fails, I am comforted by the knowledge that I know the notes in my head as well as my fingers! I imagine this would work with any other instrument too, but the benefit of piano is that the notes are laid out in front of you. It is also worthwhile trying to sing/ speak note names – either the letter-names or solfege – as this has the added benefit of using another tool: the voice as well as the fingers, ears and eyes.  

In a similar vein, talking through a piece can really help access areas of your memory that you wouldn’t otherwise have used. It may help to visualise where you are on the page to help get to grips with the geography of the piece. Remember to verbally acknowledge the sections you have created and their colours if relevant. Try stating at least the starting note of each one plus any notes that you struggle to remember, and perhaps the highest or lowest note of a phrase. It may help to create some kind of story line to help you to associate emotional memories with the music. This is especially useful for getting sections in the right order – if you remember what happens next in the story, you can remember the music associated with that ‘scene’.  

A good skill to have for memorisation is to play by ear. You should, through your practice and by listening to recordings, have a pretty good idea of how your piece sounds. Thinking about the intervals and drawing on the memories you have already built up, you may find that you can predict each note with surprising accuracy. You may also like to listen to a recording of either yourself or another musician performing the piece, and finger the notes silently as you listen. This, again, allows your brain to concentrate on your fingers separately from other factors, e.g. bowing or embouchure. This will build up muscle memory without the aid of auditory confirmation. You will need to be absolutely certain of the notes in order to prevent learning incorrect fingerings.  

Further advice on memory can be predominantly found in ML 701 (piano) section but can be applied to other instruments. You could also have a look at memory from a psychological perspective in ML 3830 (music psychology). Check the catalogue to find out where the relevant books are in the section!

https://catalogue.rncm.ac.uk/

To conclude, you should try to use as many tools as possible: touch builds up muscle memory; speaking reinforces memories by putting thoughts into words; hearing the words reinforces these memories again and is essential for playing by ear; seeing helps build up the photographic memory by visualising sections and where they come in relation to each other; and imagination can help make these memories more relatable to you, and therefore easier to access.  Then, of course, you can test the effectiveness of your practice by providing a mock performance to some friends before Recital Day.

Hopefully these tips will be useful for you, but feel free to come up with your own! You may like to think back to when you were revising for school exams – what worked for you then? You can probably adapt the memorisation techniques you used for science or geography to your instrument! 

P.S. Try not to constantly have your eyes closed in performance – it looks weird! Beth from the library 😊 

Practice series: TECHNICAL/ FAST PASSAGES

Reflections of a past student…

BlogsByBeth

I don’t know about you, but I love working on technical passages, providing I have ample time to do so (nothing worse than trying to learn a page of black with a tight time-limit). I find them to be the easiest, most gratifying aspect of technique to practise.  

First of all: remember to take your time. No matter how little time you have, no good is done by attempting last minute short cuts! Use your beloved metronome and set it at a tempo below the quickest speed you think you can play the passage. You can then gradually build up the metronome speed, ensuring quality practice and providing you with clear evidence of your progress.  

Did you know we have a sizable collection of vinyl available to listen in the library? Check out our old-school card catalogue on the far left, take a picture and bring it to counter – we will find it for you!

Be conscious that your fingers remain relaxed and close to your instrument as you increase the tempo. Remember: slow fingers, fast notes. It is really easy to tense up as the music gets faster, resulting in unreliable fingers producing clumsy, uneven notes.  

The same applies to bouncy chins (wind players!). Remember that fast tonguing is achieved by training the tongue, not the jaw. You may need to play in front of a mirror to check that the work is being done inside your mouth only. I am sure you could apply the same logic to other instruments: basically, technique should streamlined so that any unnecessary movements are eradicated.

You may be able to find helpful titbits in the instrument specific books we have: check out ML 540 to ML 1030.

Consider whether it would be beneficial to break up the passage into smaller segments (it usually is). Make sure that when you do this, there are always notes that overlap between segments. Do not, for example, practice just a bar at a time, but a bar plus a note or beat. This means you’re practising the transition between segments and not just each segment in isolation. 

Next: a favourite. Rhythms! You may have heard of using dotted rhythms to aid difficult passages. These allow you to practise moving from one note to the next quickly, in a way that is up to 50% easier. Below are the rhythms I use most frequently, which can be adjusted to suit your needs. The ratio between note lengths need not remain the same; you may want to increase the difference in length between the long note and the fast note(s), to allow more thinking time while simultaneously increasing tempo.  

  • For groups of 2 
    • The dotted quaver + semiquaver  
    • The above, in reverse 
  • For groups of 3 
    • Dotted quaver + semiquaver + quaver 
    • Crotchet + 2 quavers 
    • Quaver + crotchet + quaver 
    • 2 quavers + crotchet 
  • For groups of 4 
    • Dotted crotchet + 3 quavers 
    • Quaver + dotted crotchet + 2 quavers 
    • 2 quavers + dotted crotchet + 1 quaver 
    • Triplet + crotchet 

Groups of five or any odd number should be practised with different beatings, e.g. 2+3 AND 3+2. This will promote evenness and prevent emphasis on notes part way through a bar. Groups of 6 can use both the rhythms for groups of 2 and groups of 3.  

I also use a similar rhythmic device if there are particular notes that I need to fix, whether it be fingering, tuning or just playing the right note! I elongate the problem note(s), keeping the surrounding notes as written. This allows the brain to focus in on the tricky area, providing better memory retention than if you merely played the phrase repeatedly as written.  

As well as technique books in our MT section (on the left after the CDs) – some containing practice tips specifically for your instrument – we have several books about practice in the library at ML 3825 (down the slope on the left).

A great way to improve finger-work and overall accuracy is to practise passages slurred first, then tenuto, then with neutral articulation. This allows you to first focus on your fingers while you slur, and when they feel under control, to build up coordination between fingers and tongue/bow. Wind players should ensure they use ample air to create the smoothest legato, and then continue to blow sufficiently when articulating. Often in a worrying passage, us wind players forget to blow which only makes things more difficult! 

One last thing to remember is not to go crazy on a single passage. Practising a technical difficulty over and over will only lead to injury, so spread it out! Alternate it with other items in your practice to-do list; it will still be there when you get back.  

Slow and steady wins the race! Beth from the library 😊  

Practice Series – SCALES

Reflections of a past student…

BlogsbyBeth

As a child, I was definitely lazy when it came to scales. I was one of those children who would spend all their practice time playing pieces, and only start working on scales after getting into a frenzied panic 2 weeks before my ABRSM exam. Later on I made some improvement, but I was still aware that scales were one of my biggest weaknesses. The prospect of a technical exam at RNCM terrified me.

Fortunately, I got myself to a scales practice class in 1st year (there were a surprisingly large number of students there, and not all of them 1st years!), and ended up acing my first technical (clang). From then I continued to refine my scales practice to be more efficient and effective. This post aims to provide tools that will help you to feel secure in your practice and confident in your ability.

Firstly, it is important that you practise scales every day. They are a great way to warm up, and, because there are so many of them, it’s best to spread the load (as it were). Try to find a way to split your scales into groups. My favourite is to choose a tonal centre each day, and practise all scales beginning on A for example. This meant I covered all scales including arpeggios and 7ths in one day. It also meant that I had covered all scales within 2 weeks, after which I could start again (yippee!). You may want to try doing one key signature each day, although for that you will need to decide where diminished 7ths and augmented triads fit in. You may also choose to alternate between different methods every 2 weeks (or something) to prevent over-association (e.g. only being able to play A minor reliably if you have just been playing A major). 

We have several scales books available to borrow from our MT and MT… T sections (on the left as you walk in)

If you are crafty and have some time on your hands, you may like to create a scales pot to pick scales from at random. This is a great way to prevent over-association, but frankly, I couldn’t be bothered. This is only really worthwhile however, if you then have 3 pots: one to hold scales you excel at, one for scales that need some work, and the third for absolute tragedies. Whatever method you use, I would recommend making note of those that fall into the third category anyway, as it is good to put a few more minutes in before the 2-week period is up.

Next – my favourite practice tool, the metronome. I always practise scales with one. It discourages rushing, increases control over the fingers and, my favourite, gives you a reference point for improvement. When starting out, I would recommend setting your metronome at a lower tempo than you think you can play, then increase it as you practice. This avoids the risk of practising in unnecessary mistakes.

I also use the metronome to play in different time signatures. By this, I mean playing scales in groups of 2,3, 4, and even 5. I would say this method has been the single most effective in improving my scales. Having the beat emphasis fall on a different note in the scale messes with your head at first but your knowledge of the sequences will be far more thorough. So when you come across a scalic passage grouped in sevens in a piece: doddle!  

Did you know you can print to the RNCM computers from your own device? Log into https://print.rncm.ac.uk/ and click on Web Print to upload your document(s)

If you are struggling to get out of the rhythm you habitually use for scales, articulation can help you. Try slurring/bowing in 3s or 5s or whatever you are struggling with. It is worth practising using different articulations anyway because some scales will be more difficult when slurred and others when articulated.

However, I don’t personally believe that practising scales in different rhythms is beneficial. You may disagree, but I believe that the difficulty with rhythm is where the beat lies, and if you have used my guidance above, then you will have solved that problem. Once you know your scales well, you will be able to shape them into any rhythm.

Finally, I use scales to practise technique. Look after every note as you would in a piece. Pay attention to your fingers: are they relaxed? Tense fingers = uncontrolled fingers, and we don’t want that. Are your fingers flapping about in the air? Fix it. Keep your fingers close to the instrument and move them as little and as gently as possible. If there is a mirror available, use it! Try to focus on your hands though, and not your oh-so-attractive playing face.

As well as technique books in our MT section (on the left after the CDs) – some containing practice tips specifically for your instrument – we have several books about practice in the library at ML 3825 (down the slope on the left).

So, here is my scales practice technique:

  1. Put the metronome on at crotchet = 60 – 80 (to begin with)
  2. Play scale in quavers, slurred. Concentrate on legato, tuning, tone and fingers. There is plenty of time to think, so no mistakes allowed!
  3. Play scale in triplets, tenuto. Ensure notes are even, and articulation is uniform.
  4. Play scale in semi-quavers, staccato.
  5. Play scale in quintuplets, slurred. But only if you are ready!

If you are struggling with the notes of any particular scale, try saying the notes aloud while fingering the notes on your instrument.  This is also useful if you are physically exhausted but would still like to practise, prior to an assessment or just for giggles.

One last note (yes, I realised I wrote ‘finally’ 3 paragraphs ago, but stick with me for a bit longer) is to advocate playing arpeggios and 7ths etc. as broken chords (in triplets and semiquavers). This will consolidate your technique the same way as scales in 3rds, 4ths or 5ths strengthens your scales.

I’m done now! Until next time…

Practise well, practise strong. Beth from the library 😊


Practice Series – General advice

Reflections of a past student…

BlogsbyBeth

In this post I am offering my thoughts on how to manage your practice throughout your studies. I was by no means the perfect student, and nor do I claim to be The Expert on all things practice. This is merely a chance for you to learn from someone who has had the same, or a very similar experience to you and has come out the other side. This post will be aimed at bassoon players, but a lot of it will apply to other instruments too, and singers to a lesser extent. So don’t stop reading here!

My first advice would be to read the previous post in this series. You need to figure out what is best for you in terms of when to practise, how long for and what will make that time the most productive and beneficial.

As well as technique books in our MT section (on the left after the CDs) – some containing practice tips specifically for your instrument – we have several books about practice in the library at ML 3825 (down the slope on the left).

Next – scales. It turns out that all of your teachers who have told you how vital scales-practice is over the years were right! Doing these every day will hugely improve your general technique as well as minimising time wasted re-learning scales you have neglected for months. Watch out for a future post where I will describe ways to practise scales to keep on top of them throughout the year(s) and not merely in time for technical exams!

Same deal with excerpts. One of my biggest regrets from college was not taking excerpts seriously. Please, please, please start practising them right now and continue to do so every day just as you would with scales and studies. Despite the minimal focus on excerpts during college, these are the things that are ultimately going to get you jobs. Look at the excerpts list on Moodle, and start working through it. Aim to take one to your teacher every lesson, and take full advantage of excerpt classes, especially with teachers other than your own. Once you’ve finished one list, move on to the next one, and if you have worked all the lists to death, take an excerpt book out from the library (or even better -buy your own!) and work your way through it. Make sure you spend a considerable amount of time listening to the piece while looking through a part or a score. We have numerous miniature scores in the library for loan, as well as orchestral parts that you can look at on request (though these cannot be taken out of the library – sorry!).

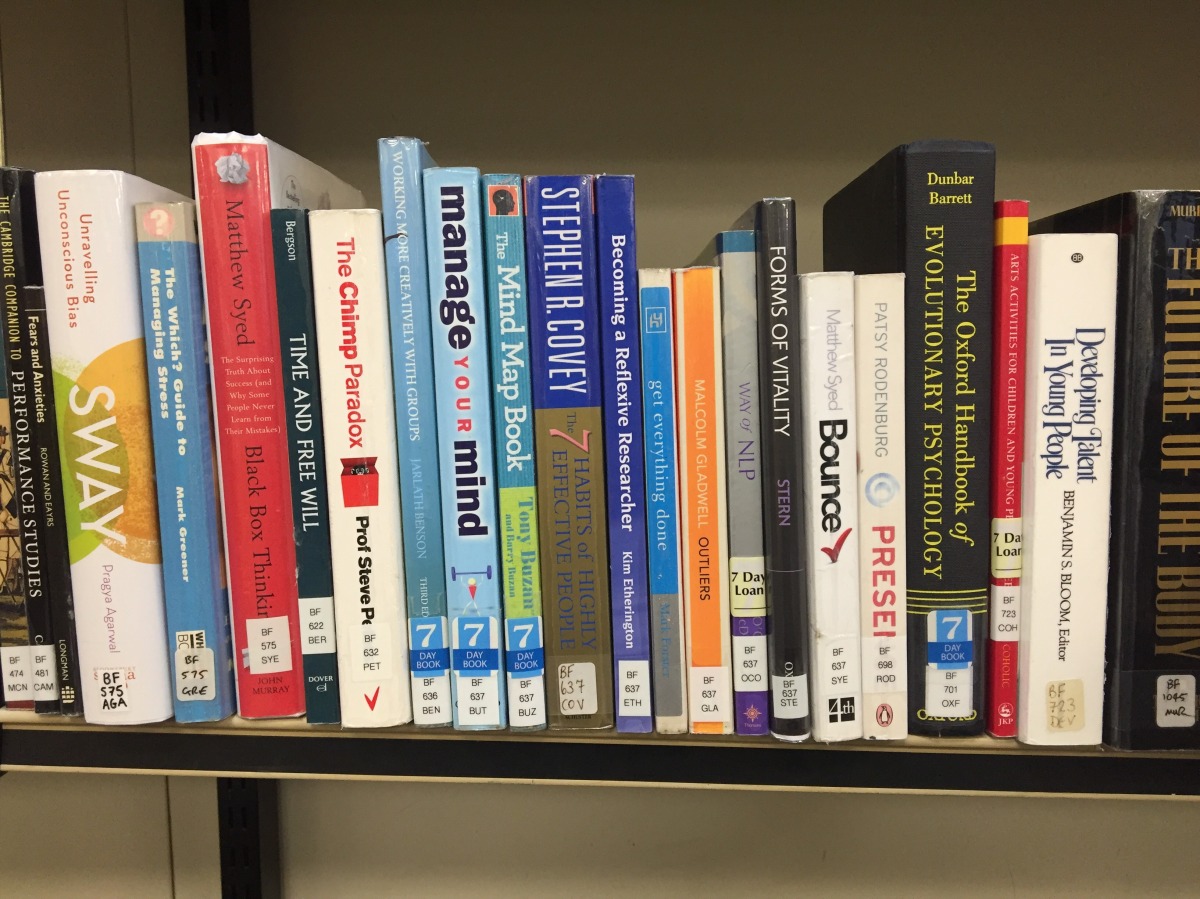
The psychology section (shelf mark: BF, pictured) is not just for students who take that module – these books can help you to maximise your potential.

This one is just for double reeders, so to everyone else: see you in a paragraph! Okay, so I don’t know about you guys, but I found it extremely difficult to get into reed-making having had no prior experience. I eventually forced myself into it by banning myself from buying any more reeds at around February of 3rd year, which resulted in a very steep learning curve and severe reed-related anxiety for my recital! (It went well in the end). So, get cracking (hopefully not literally!) early and make the most of the expert staff and equipment provided by RNCM.

Did you know we have 3 library computers specifically for searching the catalogue? They are the first row of computers on the left-hand side as you walk in.

Another thing that teachers often mentioned that I didn’t take much heed of until later, was recording myself. What put me off was the time it took to listen back and analyse my own playing. I couldn’t afford to waste my precious practice room, for which I had hovered feverishly over Asimut every 15 minutes! I later realised that I could listen to the recordings any time: while on a break, waiting for an open room or walking to/from college. It allows you to listen back to yourself from another perspective, an audience perspective, and see if you managed to pull it off. If you also record yourself in masterclasses with a tutor who inspires you, you will be able to carry that inspiration with you for whenever you need a boost in motivation.

In a similar vein, you should record and listen back to entire performances, preferably in front of an audience, even if it is just a couple of friends. Try to get yourself a studio, or even a venue if you’re lucky(!), and see what the space does to your sound. Playing in front of friends is a really good way of getting feedback in an informal setting. RNCM also provides plenty of opportunities to practise performance. The Monday Recital Series and Spotlight Series are great ways test out your performance skills in a formal setting. The SWBP department also provide informal opportunities for their students (because SWBP is the best!) called EPOPS which can be signed up for on Moodle. These can be pretty much what you make them to be, whether preparing for an audition or working on something specific, like stage presence. 

If you are sceptical of your phone’s recording abilities, we have a limited number of Zoom recorders available to loan from the library for 2 days at a time. You can find information on how to use them on Moodle – Library information – recording equipment.  

Performing as a soloist may be a personal challenge for you especially if you suffer from acute performance anxiety, but like anything else, the more you do it, the easier it becomes. That is the same for other challenges, for example playing from memory. I would encourage you to play from memory before you have to. The playing from memory requirement for my 2nd year recital was something I was particularly concerned about, and preparing some of my 1st year recital from memory really helped me to gain confidence.

What I would take away from this post is that if there is some aspect of mastering your instrument that you are worried about, don’t put it off. Jump in headfirst! It may be tricky, but hey, that’s what music college is for.

Enjoy the challenge: be proud of your achievements. Happy practising! Beth from the library 😊

Practice Series – Introduction

Reflections of a past student…

BlogsByBeth

I arrived at RNCM fully intending to make the most of my sudden abundance of ‘free’ time after a very busy two years at sixth form. Finally, I had time to practise! Except I didn’t know how to practise, what to practise, and for the first time I became overwhelmingly aware of the other music students around me who, in my mind, were listening with ears up against walls, identifying my every mistake, judging my technique, wondering how such a loser ever got into music college… 

It took a long time for me to develop my practice technique, and I can only imagine how much faster I would have progressed and how much better a musician I would be had I known then what I know now.

The first thing to do if you are anything like me, is to get comfortable with other people being able to hear what you are doing. Whether you are in halls, practising in college or in shared accommodation, people are going to hear you. Get over it. You won a place at one of the best music establishments in the world, you deserve to be there, end of. Who cares what you sound like anyway? Practice (and college for that matter) is not for sounding fabulous, it’s for becoming fabulous.

Did you know you can access past RNCM content such as seminars and concerts on Planet eStream? Find it via the library tab on Moodle!

It is then important to learn very quickly about yourself and your limitations. What motivates you to improve your playing?

Is it listening to a performer who inspires you?

A clear vision of your end goal?

The wrath of your teacher?

Could it be an upcoming performance?

Perhaps the promise of a reward after a hard slog?

Does having a routine help?

Are you more likely to do your best practice in the morning or later in the day?

As well as technique books in our MT section (on the left after the CDs) – some containing practice tips specifically for your instrument – we have several books about practice in the library at ML 3825 (down the slope on the left).

Then: how long can you apply the concentration needed for effective practice? How long can you physically play for before tiring? 1 hour? 3 hours? More? What is the maximum amount of practice advisable for your instrument in a day? This can vary a lot between instruments but it is a serious thing to consider, because let me tell you: you do not want to be stuck with repetitive strain injury and unable to pick up your instrument for days, weeks at a time. Build up your stamina gently, just as you would if training for a marathon, for instance.

Side note – it may be beneficial to find some stretches to do in between playing as an extra preventative measure. Some days you will undoubtedly be rushing from back-to-back rehearsals/classes/performances, so make sure to make time to look after your body. The following link has some tips on preventing injury, and can also be found on the Moodle Health and Wellbeing page:

Some of you may consider a scheduled day off within a time period. This is okay by the way! Give your body and brain a rest and come back refreshed. I would argue that some time away from the instrument can be hugely beneficial to your playing. Get out of your practice room, go for a walk get some air, join a football team, watch some guilt-free Netflix, chill.

Speaking of Netflix, we all have weaknesses when it comes to distraction. Are you going to be able to ignore your phone lighting up with notifications from this app or another? What will it take for you to concentrate on the task at hand? Putting it on silent? Turning it off? Leaving it in another room? Be honest with yourself, admit your procrastinating tendencies and control their power over you.

Finally, know when to stop. If your body is exhausted, if your brain is exhausted – just stop. You’re not going to be doing any good by carrying on – in fact, you will probably be undoing all your previous good work by forcing your body to do something it’s not ready for – j u s t  s t o p. Take a break and try again later or tomorrow.

Remember that what works for someone else may not work for you, so be sure to create your own practice model and not compare yourself to others who have different bodies and brains from you!

Thanks for reading, now go and practise. Stay healthy! Beth from the Library  😊